Paid ticketing for in-person events
Last updated: November 6, 2026
Sell tickets to your in-person events, offer discount codes, and see who bought what. Payments go straight to your own Stripe account.
With ticketing turned on, attendees pick a ticket, can enter a promo code, and pay before they're registered. You can offer several ticket types per event (for example General Admission, VIP and Student), each with its own price, capacity and sales window.
This article is organized in five parts that build on each other:
Connect Stripe and try test payments
Create ticket types
Add coupons and promo codes
What attendees see at checkout
Track ticket holders in Participants
Using an outside ticketing tool instead? See Integrate paid ticketing registration with Sequel.io.
Part 1: Connect Stripe and try test payments
Where to find it
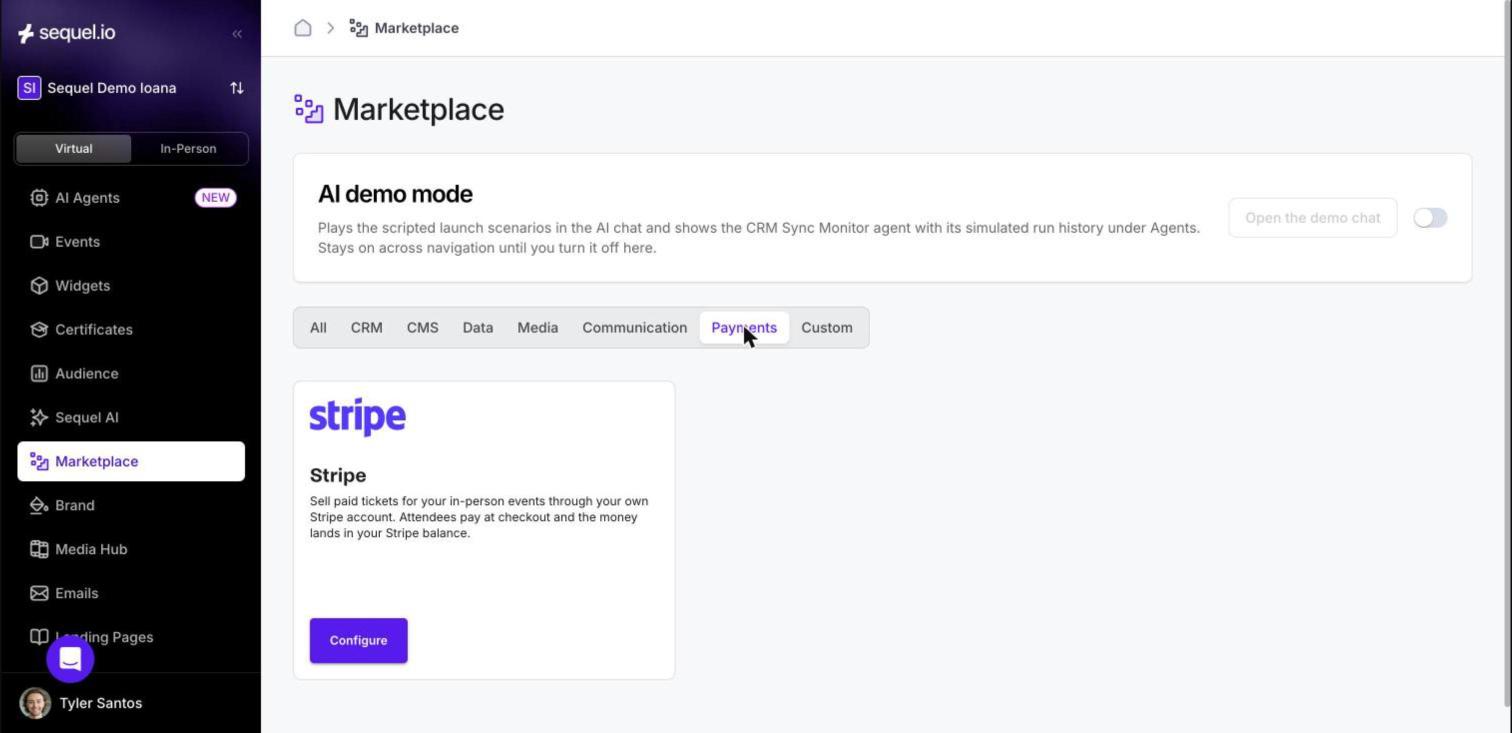
Go to Marketplace in the left sidebar, open the Payments category, and click Configure on the Stripe card.
Connect your Stripe account
Click Connect Stripe. You'll sign in to Stripe and approve Sequel there. You never type API keys into Sequel. Ticket revenue lands in your own Stripe balance.
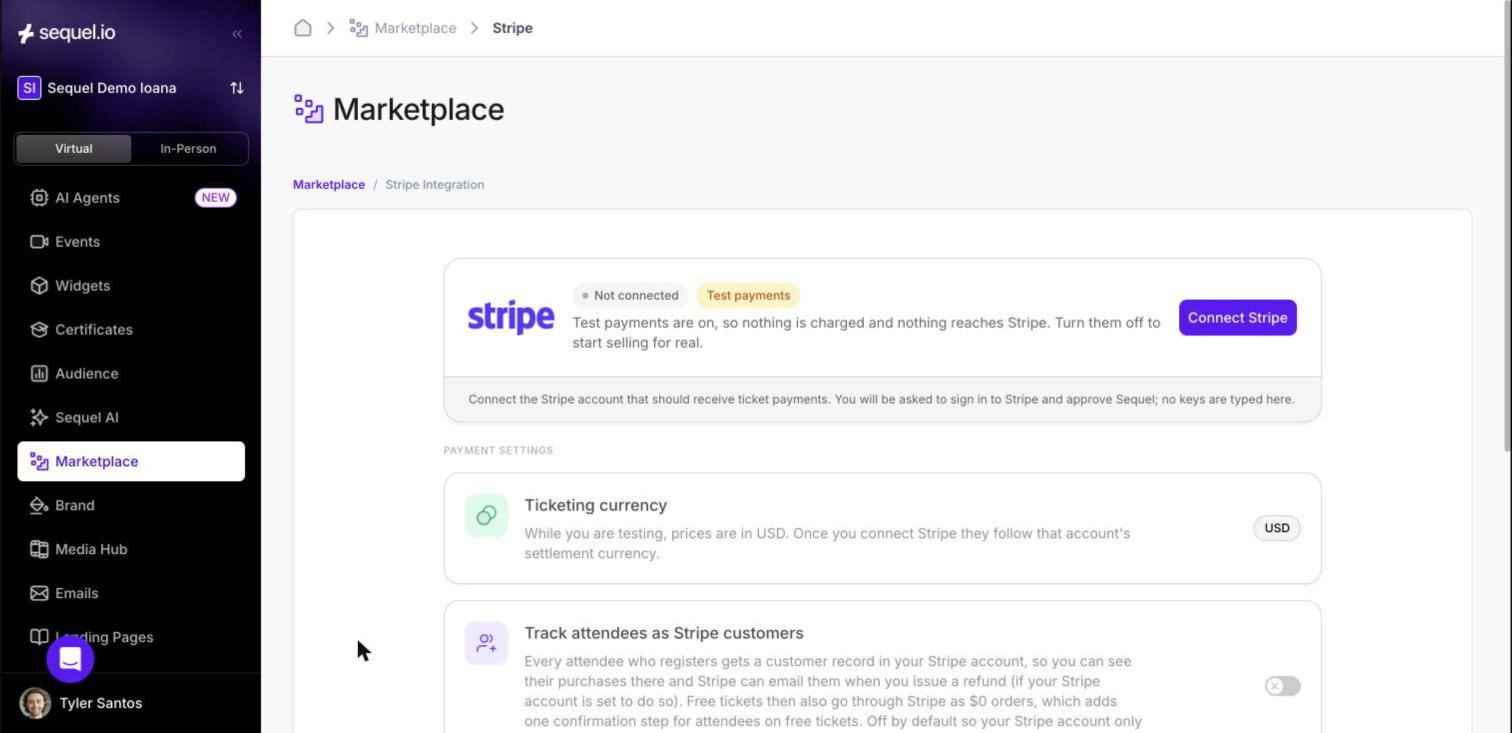
Once Stripe is connected, ticket prices use your Stripe account's settlement currency. While you're testing, prices are shown in USD.
Try it first with test payments
Turn on Test payments to try the whole ticketing flow before you sell for real. You don't need a Stripe account or a card. Attendees go through a simulated checkout that you can pass or decline. Everything around it works for real: seats are held and counted, discount codes are redeemed, registrations are created, confirmation emails go out, and badges print. The only difference is that no money moves and nothing is created in Stripe.
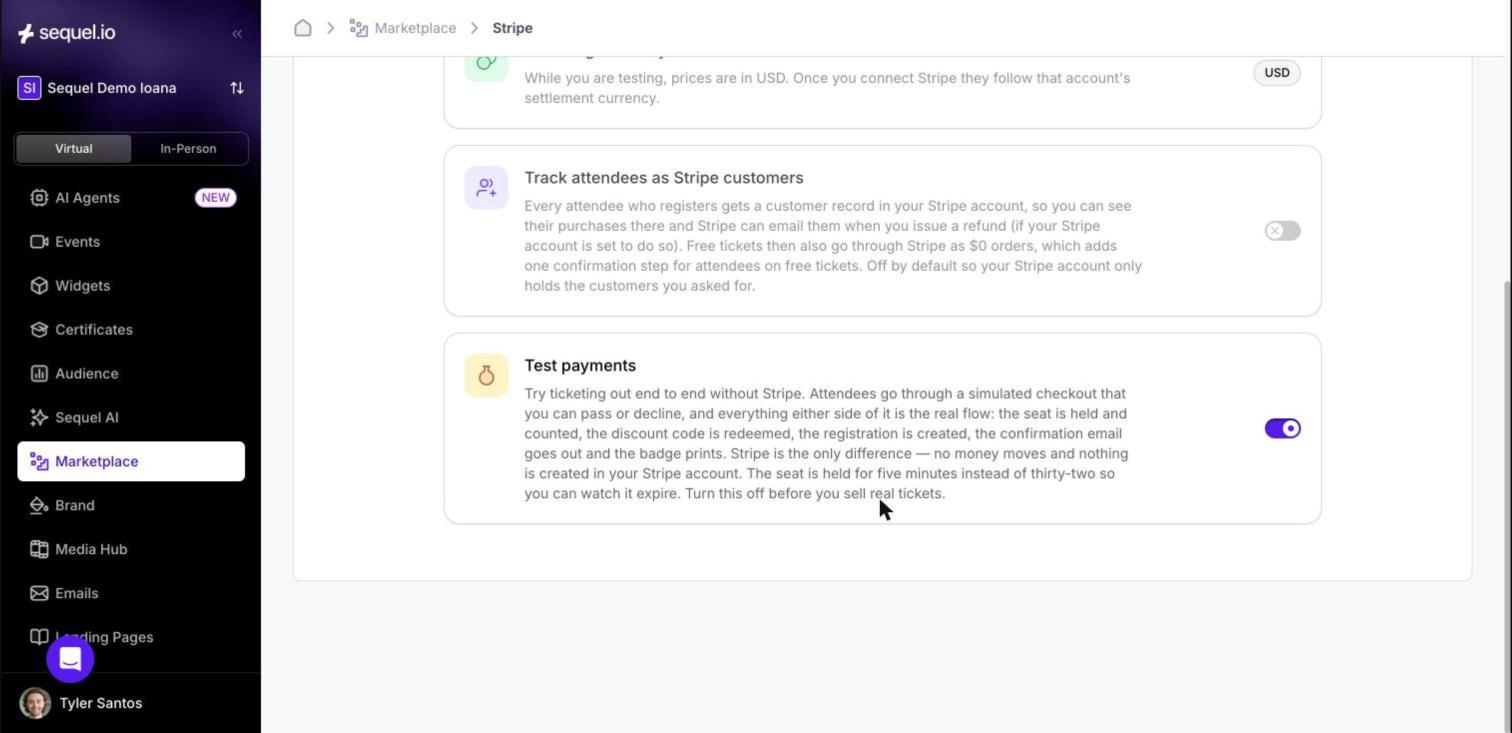
Tip: With test payments on, a seat is held for 5 minutes during checkout instead of 32, so you can watch a hold expire without waiting.
Important: Turn test payments off before you start selling real tickets.
Optional: track attendees as Stripe customers
Turn this on to create a customer record in Stripe for every registrant. You can then see their purchases in Stripe, and Stripe can email them when you issue a refund (if your Stripe account is set up to do so). With this on, free tickets also go through Stripe as $0 orders, which adds one confirmation step for attendees on free tickets. It's off by default.
Part 2: Create ticket types
Turn on ticketing for your event
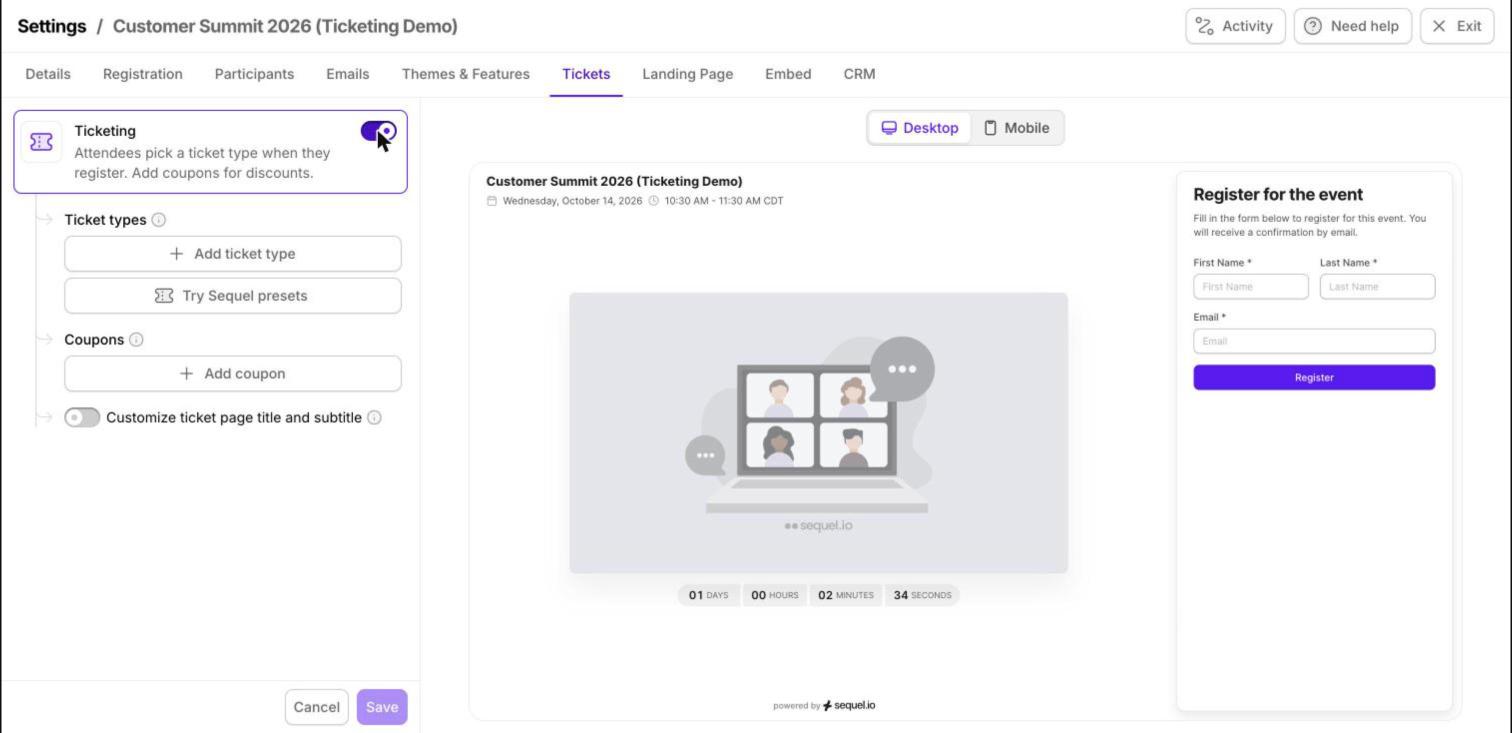
Open your in-person event, go to Settings, and select the Tickets tab. Turn on the Ticketing switch. The live preview on the right shows exactly what attendees will see.
Start from Sequel presets (optional)
Click Try Sequel presets to add three starter tickets: General Admission (set as the default), VIP (20 seats), and Early Bird. Presets start at $0.00, so remember to set a price on each one.
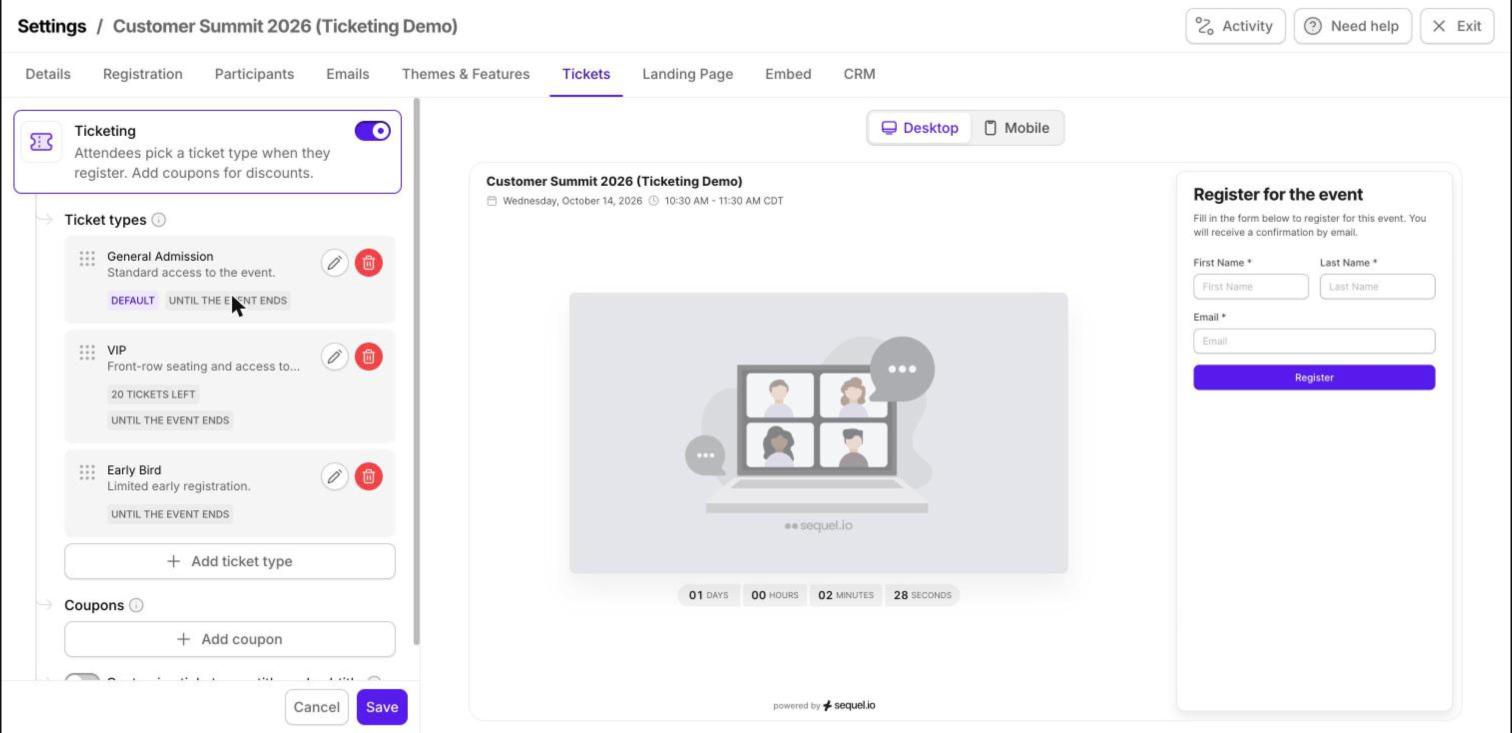
Add a ticket type
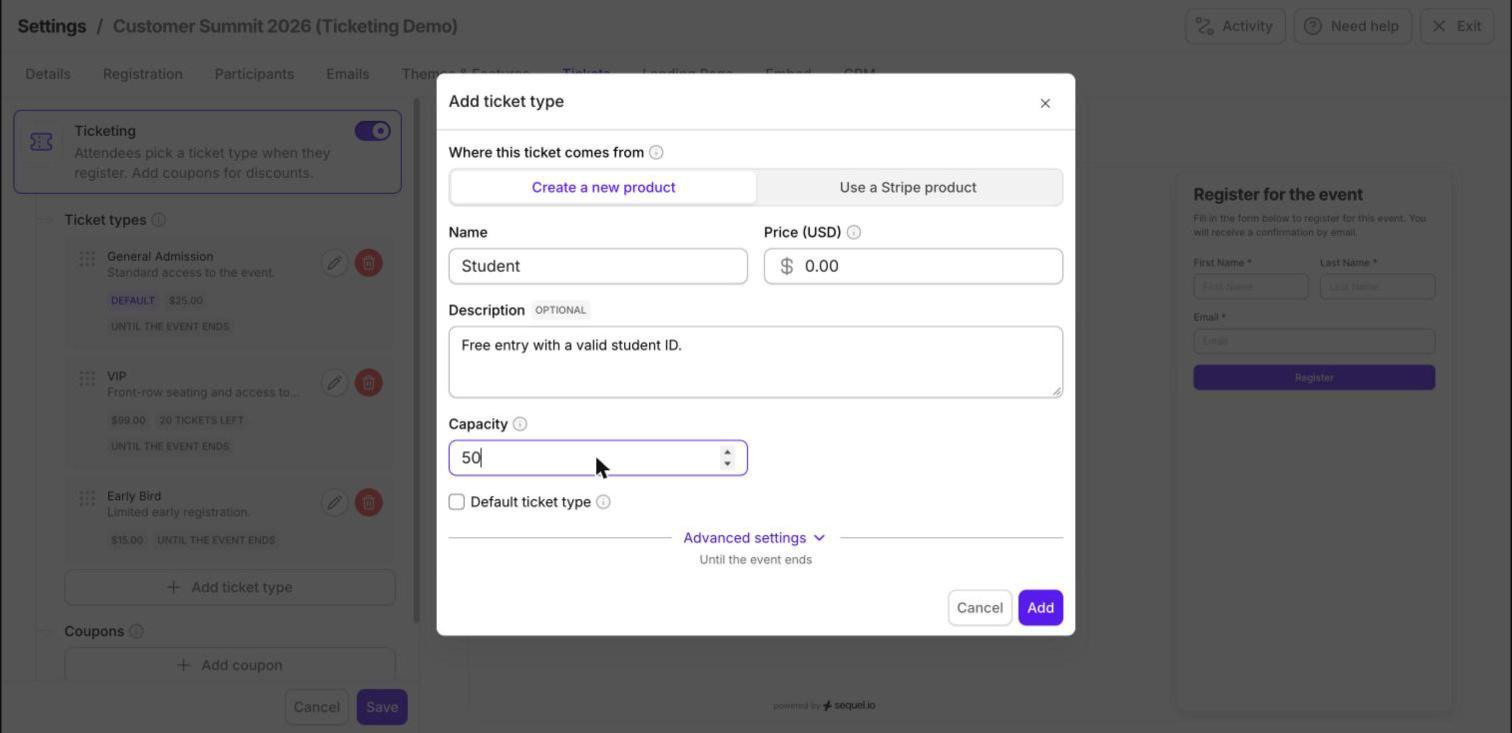
Click Add ticket type.
Under Where this ticket comes from, keep Create a new product. Choose Use a Stripe product only if you want to sell a product that already exists in your Stripe account.
Enter a Name and Price. A price of 0 makes the ticket free.
Add an optional Description. Attendees see it when they pick a ticket.
Set a Capacity if seats are limited. Leave it empty for unlimited.
Check Default ticket type for the ticket people get if they register without choosing one.
Click Add.
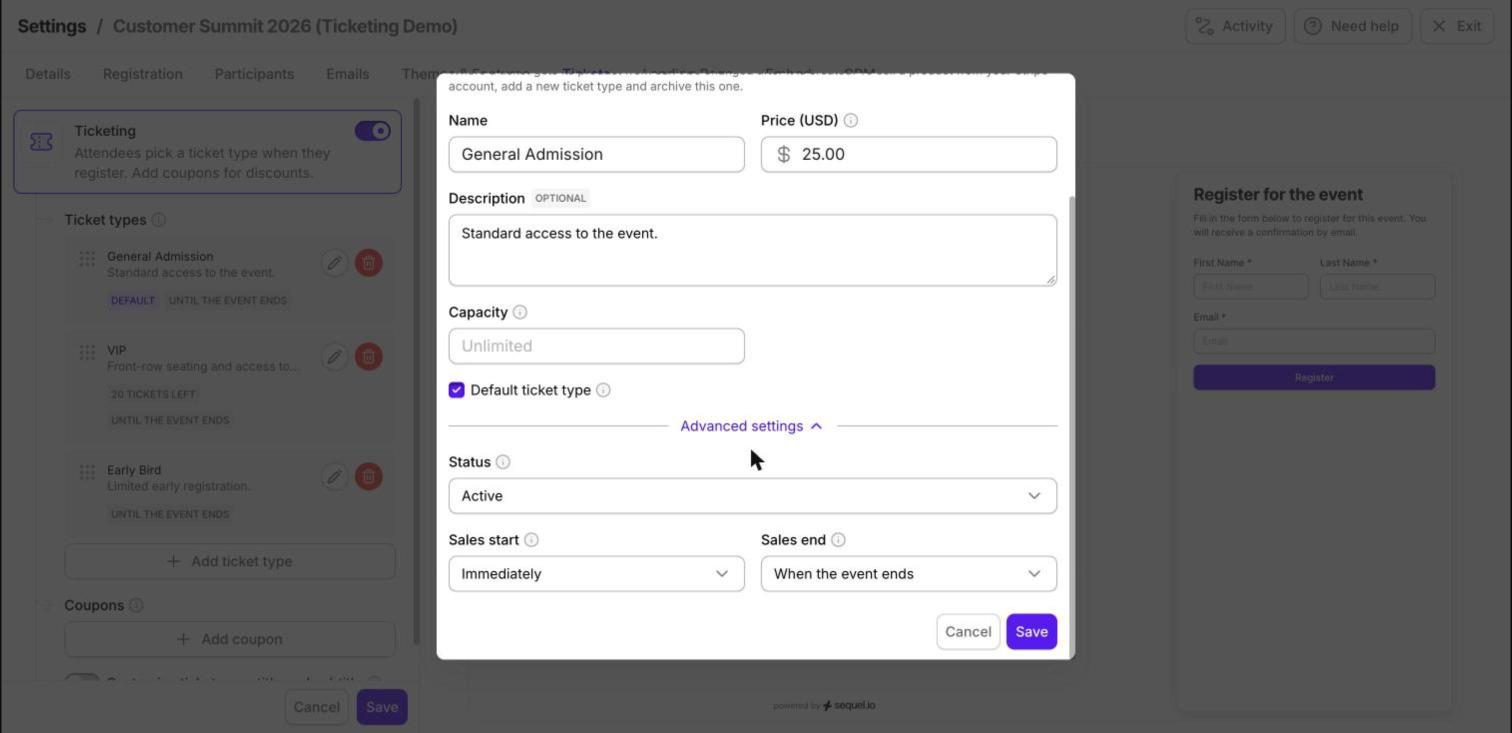
Advanced settings
Open Advanced settings in the ticket dialog to control:
Status: keep a ticket Active, make it Unlisted (hidden from the public list but still available to anyone with its link), or Archive it.
Sales start: immediately, or from a date you choose.
Sales end: when the event starts, when it ends, or a fixed date. The first two follow your event, so rescheduling the event moves them too.
Save your changes
Adding or editing a ticket only adds it to the list. Nothing is saved until you click Save at the bottom of the Tickets tab, so you can add several tickets and coupons and save once.
Good to know:
Where a ticket's product comes from can't be changed after it's created. To switch to a Stripe product, add a new ticket type and archive the old one.
Editing a ticket that people have already bought only affects new registrations.
Once someone holds a ticket, or a coupon points to it, you can't delete it. Archive it instead.
Part 3: Add coupons and promo codes
Coupons live on the same Tickets tab, below your ticket types. A coupon holds the discount terms. A code is what attendees type. One coupon can hold many codes that share a single usage limit.
Create a coupon with one code
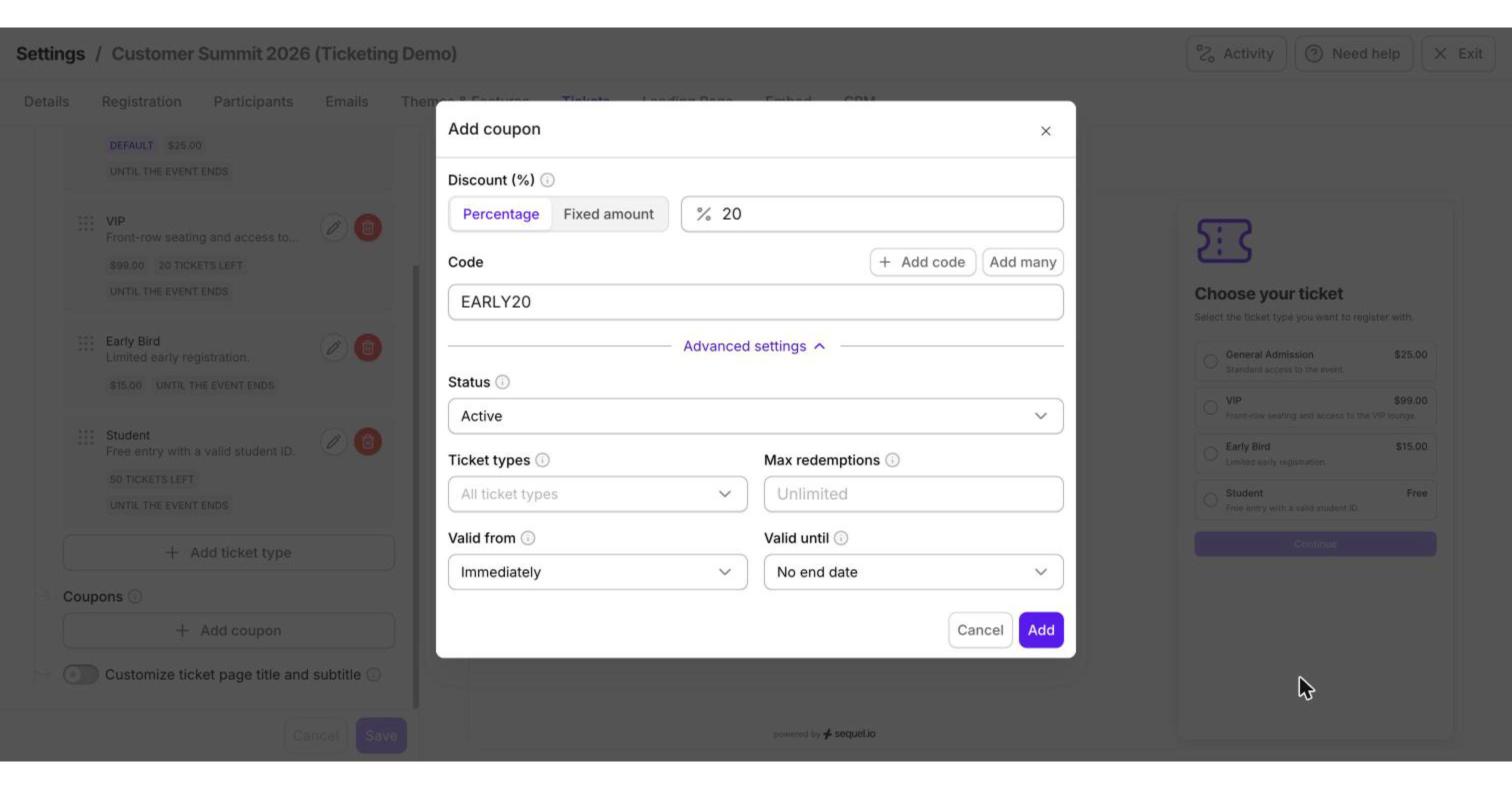
Click Add coupon.
Choose Percentage or Fixed amount and enter the discount.
Enter the Code attendees will type, for example EARLY20.
Open Advanced settings to limit which Ticket types it works on, set Max redemptions (leave empty for unlimited), and choose Valid from and Valid until dates.
Click Add, then Save the tab.
Create a coupon group with many codes
Give each partner, speaker or influencer their own code so you can see who drives registrations, while one shared limit caps total use.
In the coupon dialog, click Add many.
On Paste a list, enter one code per line. Add a label after a comma (for example ANDREI, Andrei (LinkedIn)). Labels are for you and aren't shown to attendees. Or use Generate to create codes automatically.
Click Add codes. A coupon can hold up to 50 codes.
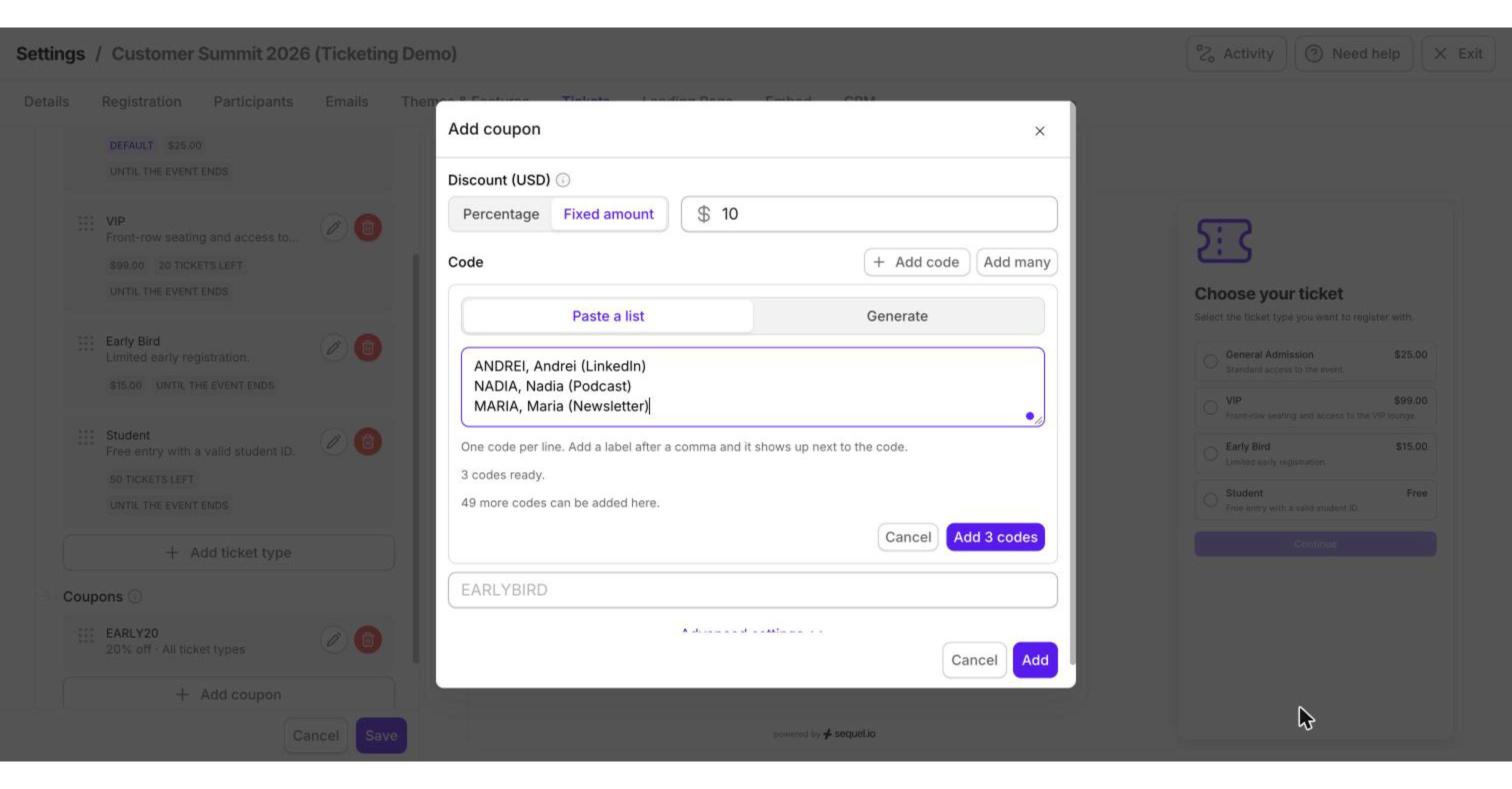
When a coupon has more than one code, it becomes a coupon group. Give it a Name that describes the group, such as "Influencer codes".
Important: Once you save a coupon group, its discount can't be changed, because Stripe can't change a discount that codes already point to. Dates, ticket types and the total limit stay editable. Double-check the amount before saving.
After saving, each coupon shows a summary of its discount, ticket types, number of codes and uses left.
[Screenshot 10: Saved coupons]
Part 4: What attendees see at checkout
1. Choose a ticket and apply a code
Attendees pick a ticket on your event page or embedded registration form. Once they've chosen a paid ticket, a Promo code field appears. A valid code shows the discount and the new total, with the original price crossed out.
[Screenshot 11: Ticket picker with promo code]
If a code doesn't apply to the selected ticket, attendees see a clear message and can pick another ticket or code.
2. Fill in the registration form
The form shows a Your ticket summary with the price, savings, and a Change link to go back.
[Screenshot 12: Your ticket summary]
3. Pay
Paid tickets go to checkout. The attendee's seat is held while they pay, so it can't be sold twice. With test payments on, this step is simulated: no card is needed, and you can pass the payment or Simulate a declined card.
[Screenshot 13: Checkout]
Free tickets skip payment entirely.
4. Confirmation
After payment, attendees see a confirmation and can add the event to their calendar. A confirmation email is sent too.
[Screenshot 14: Confirmation]
Part 5: Track ticket holders in Participants
On your event's Participants tab, every registrant now shows their Ticket type, the Coupon they used, and their Payment. Use the Ticket type filter to see who bought each ticket. Payments made in test mode are marked TEST.
[Screenshot 15: Participants with ticket columns]
Good to know
Refunds are issued from your Stripe dashboard, not in Sequel.
Receipts come from Stripe. No receipt emails are sent in test mode.
Unlisted tickets are hidden from the ticket list but can still be bought by anyone with the direct link.
Duplicating an event doesn't copy its tickets, coupons or badges.
100%-off codes still ask for card details, to prevent bots.
Changing currency doesn't convert prices. For example, $49.99 becomes £49.99.
Walk-ins at the door get the event's default ticket type unless staff choose another.